
Email when a new product is created
Overview
Planufac automations can send an email as soon as a new product is created.
This is useful when someone on the team needs to be notified about new products — for example to check data, complete listings, or follow up on setup — without manually watching the product list.
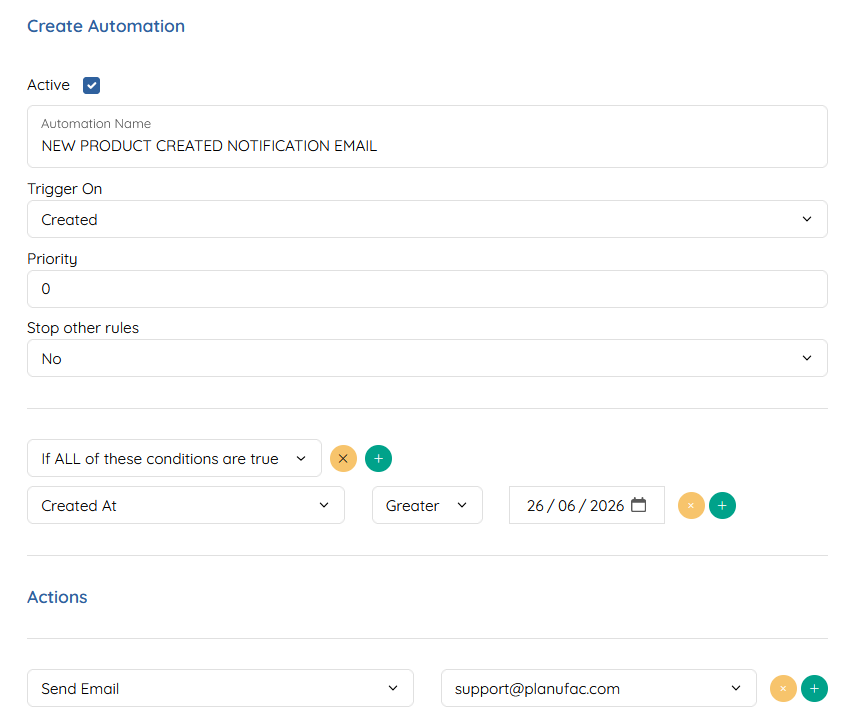
Example automation name: NEW PRODUCT CREATED NOTIFICATION EMAIL
What it does
When the automation is active and its conditions match:
- A product is created in Planufac.
- Planufac checks the automation rules (for example Created At after a set date).
- If the rule matches, it sends an email to the address you configure (for example support@planufac.com) with product information.
Where to set it up
- Open Automations in Planufac (Automations list).
- Create a new automation or open an existing one.
- Make sure Active is ticked if you want it running.
Example setup
Use this as a guide when building the same kind of rule:
| Setting | Example value |
|---|---|
| Automation name | NEW PRODUCT CREATED NOTIFICATION EMAIL |
| Active | Yes |
| Trigger On | Created |
| Priority | 0 |
| Stop other rules | No |
| Conditions | If ALL of these conditions are true |
| Condition | Created At → Greater → (your start date, e.g. 26/06/2026) |
| Action | Send Email → choose the recipient (e.g. support@planufac.com) |
Why use a Created At condition?
Using Created At is greater than [date] means only products created after that date will fire the email. Older products are not treated as new for this notification, and you reduce the risk of unexpected bulk emails when the rule is first switched on.
Choose a start date that matches when you want notifications to begin (often the go-live day of the automation).
How to create the automation (step by step)
- Go to Automations.
- Click to create a new automation.
- Set Automation Name (e.g. NEW PRODUCT CREATED NOTIFICATION EMAIL).
- Tick Active.
- Set Trigger On to Created.
- Under conditions, choose If ALL of these conditions are true.
- Add: Created At → Greater → pick the start date.
- Under Actions, choose Send Email and select who should receive it.
- Save the automation.
Tips
- Confirm the recipient is correct before leaving the rule active.
- Use Priority only if several product automations might clash; for a simple notify-on-create rule, 0 is fine.
- Leave Stop other rules as No unless you intentionally want this rule to block others.
- After go-live, create a test product (if safe in your environment) and confirm the email arrives.